How Can We Help?
Quick Start Guide
*Notice: (Aug 17, 2020) – We’re currently working on an easy-to-use setup wizard, but please feel free to use this guide for now.
Overview
This guide will help you get setup in minutes. {…}
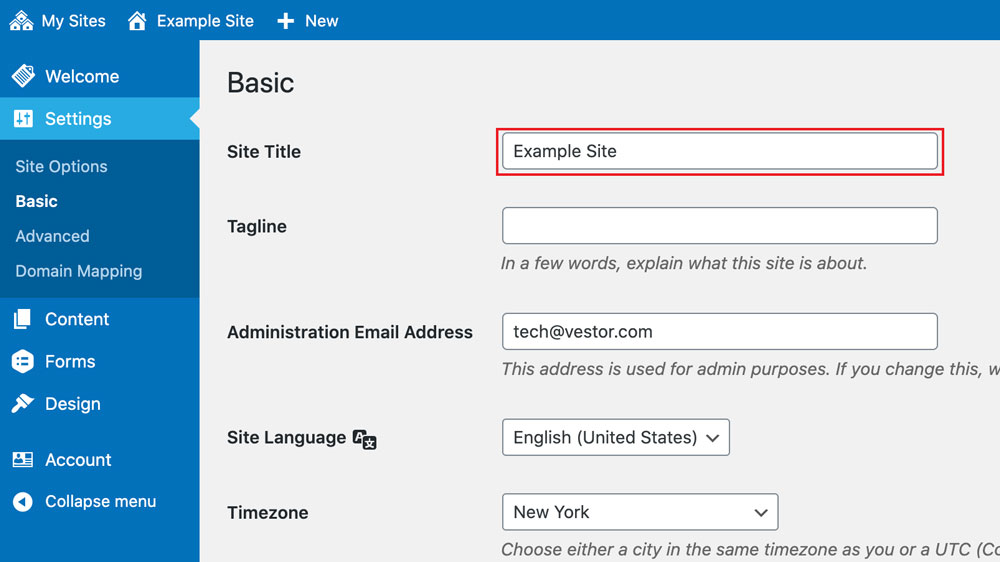
Change your Site Title
Go to Settings > Basic. Edit the Site Title field.
The Site Title, by default, is used in every page of your site as part of the search engine page title. We recommend entering your company name here.
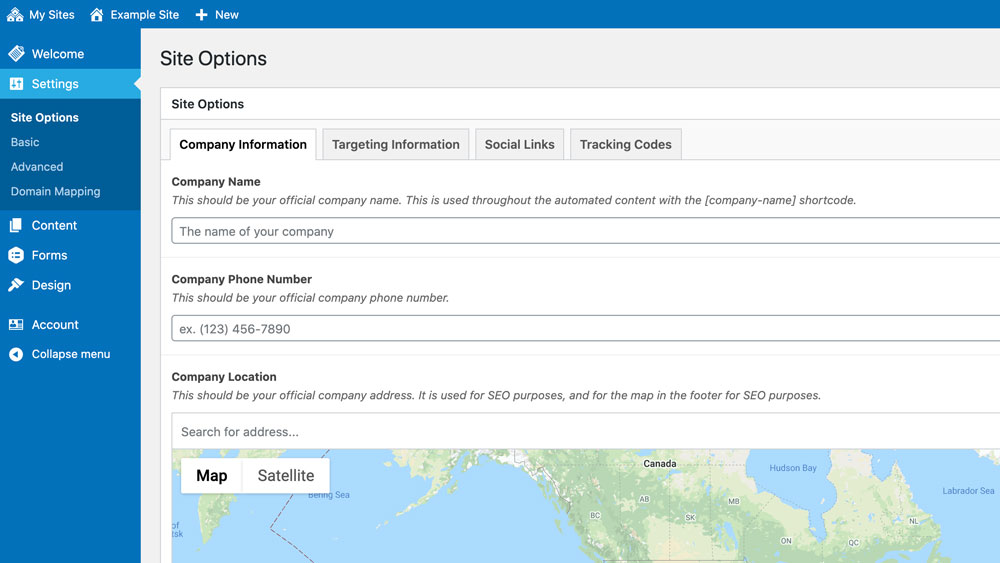
Set your Site Options
Go to Settings > Site Options. We will cover the basics in this guide. To read more about all of the Site Options, view the Site Options article.
Add your Company Information
All of the fields on this tab should be filled out completely. The settings under this tab have an impact on your SEO (Search Engine Optimization). You should enter your official company contact information here.
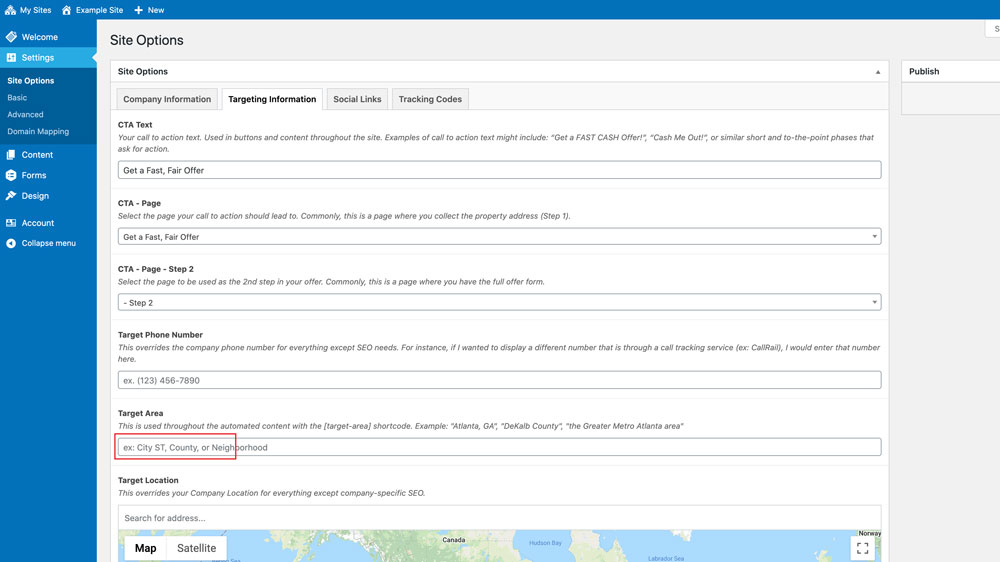
Set your Target area
The most important field on the Targeting Information tab is the Target Area. Please enter the name of the area you want to target, in general and throughout the site, in plain English. Ex: “Atlanta, GA”, “DeKalb County”, “the Greater Metro Atlanta area”, etc.
Customize the Design
Go to Design. We will cover the basics in this guide. To read more about Design settings, read the Design article.
Add or create a logo
Go to Design. Click Branding.
I already have a logo:
Under Custom Logo, click “Select image”. Click the “Select files” button under the Upload Files tab. Select the image on your computer to upload.
I need to create a logo:
Under Logo Font Family, choose a font. Under Logo Icon, choose an icon. Your site title will be updated to reflect the changes.
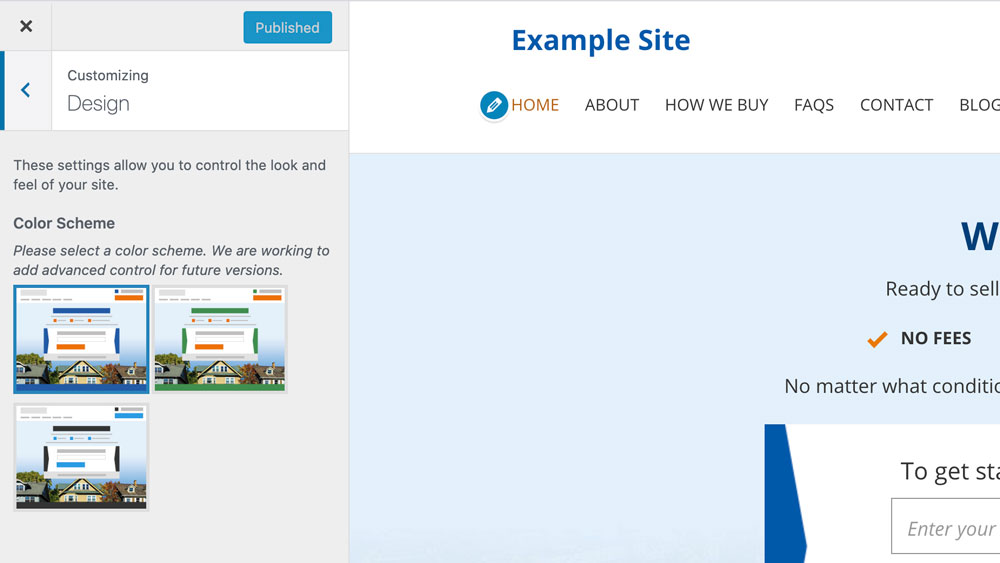
Choose a color scheme
Go to Design. Click Design. Pick a color scheme that most closely matches your company branding. Additional options may be added at a later date.
Launch your site
If you’ve completed all of the steps above, you’ve handled all of the basics and can safely launch your site. If you’d like to personalize your site even more, return to the Help Center and take a look through our other articles.
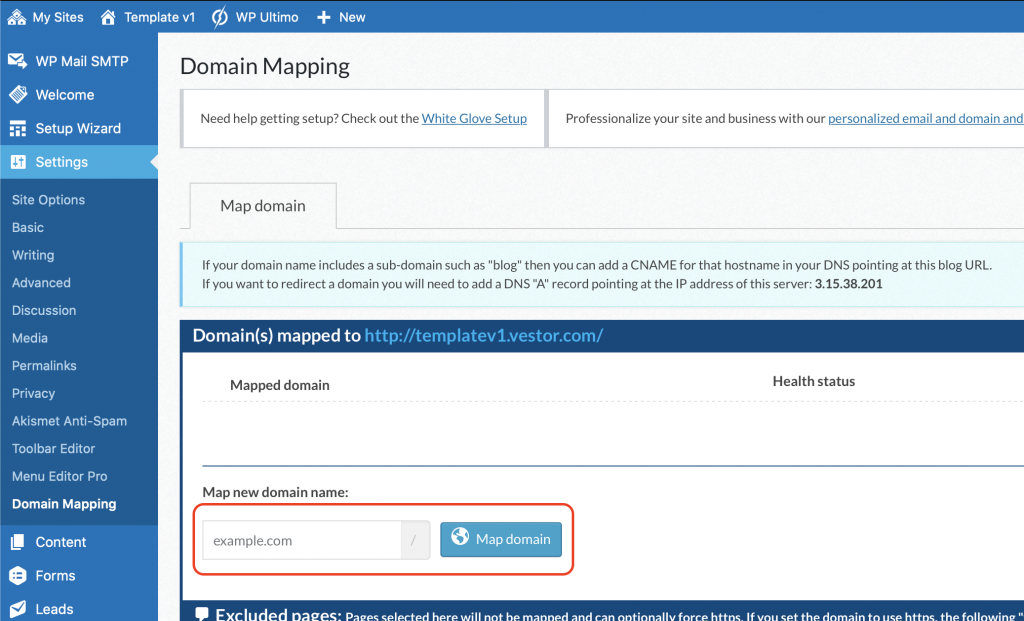
Configure your domain
We’ll cover the basics here. If you wish to read about this topic in more detail with additional instructions, please go to the Domain Mapping article.
Go to Settings > Domain Mapping. Enter your domain (excluding http:// or https://) under “Map new domain name” and click the “Map domain” button.
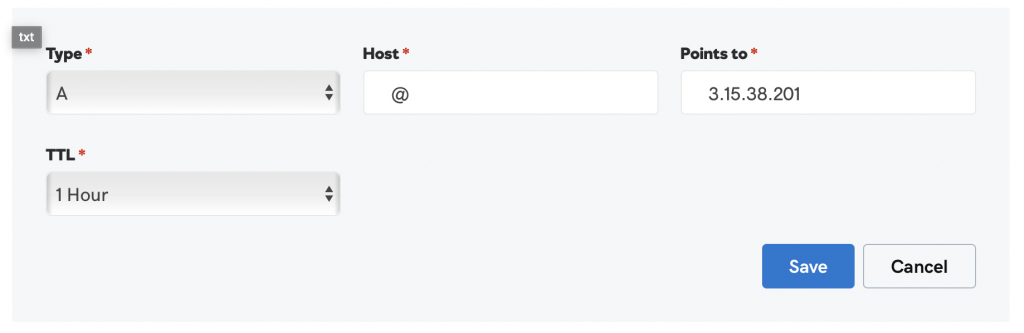
After you’ve entered in the mapped domain as above, you need to login to your domain registrar (wherever you purchased your domain). You will need to update your DNS records to point your domain to your new Vestor site.
I am using my primary domain
Go to your domain registrar’s DNS settings. Add a new record with the following settings:
Type: A
Host: @
Points to: 3.15.38.201
TTL: Default
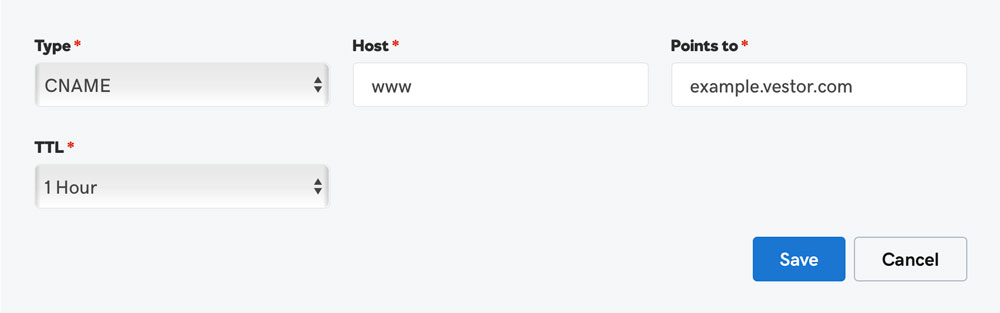
I am using a subdomain
(ex: subdomain.example.com) – Go to your domain registrar’s DNS settings. Add a new record with the following settings:
Type: CNAME
Host: Enter your subdomain here
Points to: Enter your Vestor.com site address here
TTL: Default
Congratulations! Your site is setup. Vestor will automatically begin the process of setting up your free SSL certificate (within 24 hours).
If you need further support or cannot find what you’re looking for in this guide, please reach out to support here.